iOS
Completing the DexProtector Process
Final Checklist
The DexProtector process can be completed as soon as you have finalized all of the steps necessary for activation and configuration. We especially recommend making sure that you have done all of the following before protecting your application:
- Activated your DexProtector license (CLI or DexProtector Studio)
- Set your protection mechanisms and filters (configuration file or DexProtector Studio)
- Specified your signing options (CLI, configuration file, or DexProtector Studio)
Run DexProtector via the CLI
To run DexProtector via the CLI, use the following command:
java -cp dexprotector.jar com.licel.dexprotector.ios.ConsoleTask <options> <src> <dest>Here <src> is a path to the file intended for protection, and <dest> specifies the destination path for the protected file (it may be the same as <src>). The <options> are as follows:
|
DexProtector version and license status info |
|
Activate DexProtector using your unique, single-use activation code |
|
Generate a request code for offline activation. |
|
Complete the offline activation process by entering the response code that you have received. |
|
Specify the location of the DexProtector license file under a different name and/or path from the default. ** |
|
Specify the absolute path to the ProGuard mapping file, if ProGuard is used. Note: This is not necessary for users of the DexProtector Gradle plugin. ** |
|
Print the verbose log of the DexProtector process to stdout. ** |
|
Specify the location of the DexProtector configuration file under a different name and/or path from the default (dexprotector.xml). |
|
Mode of signing the output file (default: debug). ** |
|
Path to the file containing the signing keys. ** |
|
Key alias. ** |
|
Password to the keystore file containing the signing keys. ** |
|
Password for the signing key. ** |
|
Note: Only for signMode == none. Specifies the path to the signing certificate file. This is necessary if the the app's signing is delayed until after it has been DexProtected (for platform/system/pre-installed apps). ** |
|
Note: Only for signMode == Google, or signMode == Amazon. Specifies the target Google Play app signing key / Amazon signature's SHA256 certificate fingerprint. ** |
|
Specify path to a file containing a list of log servers for Certificate Transparency. Note that the path name should start from the project's root. If this path is not set, DexProtector uses a default log server list (https://www.gstatic.com/ct/loglist/v2/loglist.json). If you want to create your own, please follow the JSON format of the default one. ** |
|
Specify that the file to be DexProtected is a library/SDK (AAR - Android archive) ** |
|
Specify ABI configurations for which DexProtector native protection libraries will be added. See supported ABIs. |
Run DexProtector via DexProtector Studio
When you have configured your protection settings (see our guide to configuring DexProtector and our guide to the protection process with DexProtector Studio), click 'Run protection' and you can observe the DexProtector process as it occurs. This should only take several seconds.
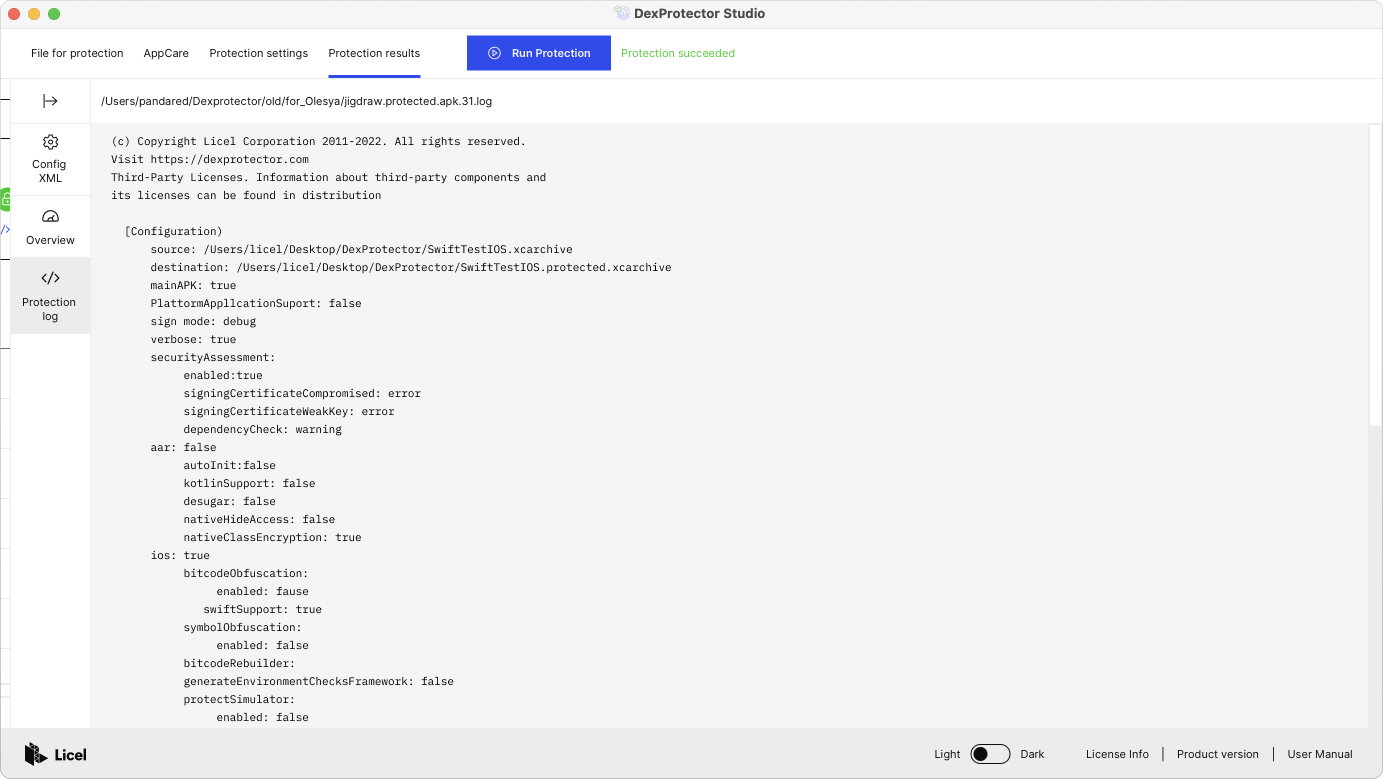
Afterwards, you can easily view the the protection log, the path to the protected package, and an overview of recent protection results:
And when you are finished, you can save your newly created configuration profile to be referenced, reused, or adapted later:

-
What is DexProtector?
Introduction to DexProtector > What is DexProtector? -
Obfuscation & Encryption Capabilities
Introduction to DexProtector > Obfuscation & Encryption Capabilities -
RASP, Security, and Anti-Fraud Capabilities
Introduction to DexProtector > RASP, Security, and Anti-Fraud Capabilities -
Overview
DexProtector for iOS > Overview -
1. Download
Getting started > 1. Download -
2. Activate
Getting started > 2. Activate -
Activate via CLI (online)
Getting started > Activate via CLI (online) -
Activate via CLI (offline)
Getting started > Activate via CLI (offline) -
Activate via DexProtector Studio (online)
Getting started > Activate via DexProtector Studio (online) -
Activate via DexProtector Studio (offline)
Getting started > Activate via DexProtector Studio (offline) -
3. After activation
Getting started > 3. After activation -
Introduction to configuring DexProtector
Configuring DexProtector > Introduction to configuring DexProtector -
Configuration file overview
Configuring DexProtector > Configuration file overview -
Filters: A guide to targeting resources
Configuring DexProtector > Filters: A guide to targeting resources -
Resource Encryption
Configuring DexProtector > Resource Encryption -
Configuring DexProtector for applications
Configuring DexProtector > Configuring DexProtector for applications -
JavaScript and HTML-based Hybrid and Cross-Platform Apps
DexProtecting Hybrid and Cross-Platform Applications > JavaScript and HTML-based Hybrid and Cross-Platform Apps -
Flutter
DexProtecting Hybrid and Cross-Platform Applications > Flutter -
Frameworks
DexProtecting iOS Frameworks and XCFrameworks > Frameworks -
XCFrameworks
DexProtecting iOS Frameworks and XCFrameworks > XCFrameworks -
Overview
DexProtector Studio > Overview -
Using DexProtector Studio: DexProtector JAR and License File
DexProtector Studio > Using DexProtector Studio: DexProtector JAR and License File -
Managing DexProtector JAR and License File
DexProtector Studio > Managing DexProtector JAR and License File -
Activating your license via Studio (online)
DexProtector Studio > Activating your license via Studio (online) -
Activating your license via Studio (offline)
DexProtector Studio > Activating your license via Studio (offline) -
Protecting your iOS app or Framework with DexProtector Studio
DexProtector Studio > Protecting your iOS app or Framework with DexProtector Studio -
Protection Recommendations
DexProtector Studio > Protection Recommendations -
Load Package for Protection
DexProtector Studio > Load Package for Protection -
Manage Protection Settings
DexProtector Studio > Manage Protection Settings -
Run Protection and View Protection Results
DexProtector Studio > Run Protection and View Protection Results -
Final Checklist
Completing the DexProtector Process > Final Checklist -
Run DexProtector via the CLI
Completing the DexProtector Process > Run DexProtector via the CLI -
Run DexProtector via DexProtector Studio
Completing the DexProtector Process > Run DexProtector via DexProtector Studio -
Using Alice with DexProtector
Alice - Threat Reporting and Telemetry > Using Alice with DexProtector -
General FAQs - DexProtector for iOS
FAQs > General FAQs - DexProtector for iOS -
FAQs on Installation, Activation, Configuration, and Distribution
FAQs > FAQs on Installation, Activation, Configuration, and Distribution
Link copied!