iOS
DexProtector Studio
Overview
DexProtector Studio is our desktop application, included with every DexProtector license. Studio offers a straightforward GUI where you can control every aspect of the DexProtector protection process. Studio allows you to:
- activate your DexProtector license
- observe DexProtector’s analysis of your input file
- configure the protection settings for your project
- create protection profiles
- visualize exactly how DexProtector’s protection mechanisms are applied to your code and resources
- manage your Alice integration
Using DexProtector Studio: DexProtector JAR and License File
Managing DexProtector JAR and License File
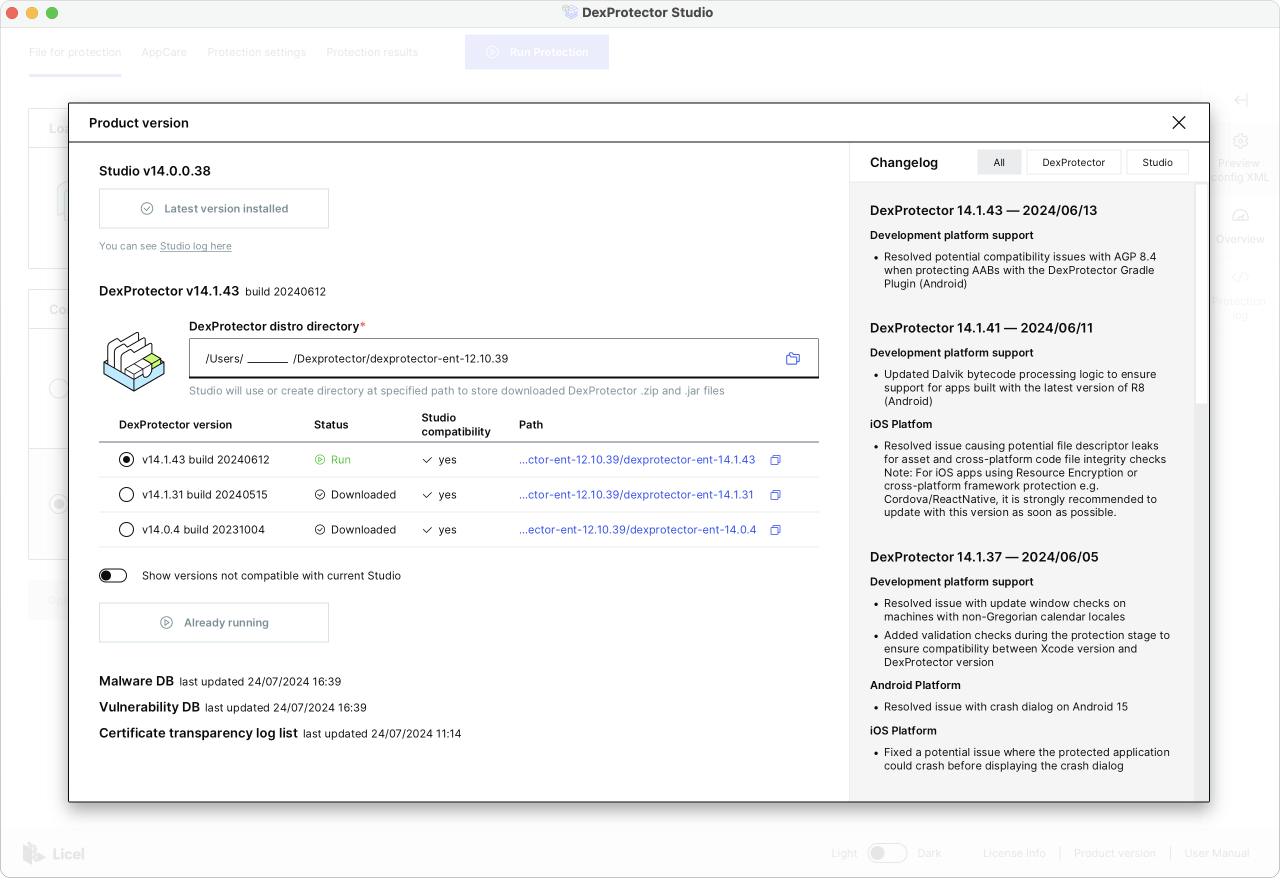
If the DexProtector JAR file is not in the same folder as DexProtector Studio, you will have to specify its location before you can begin using Studio:
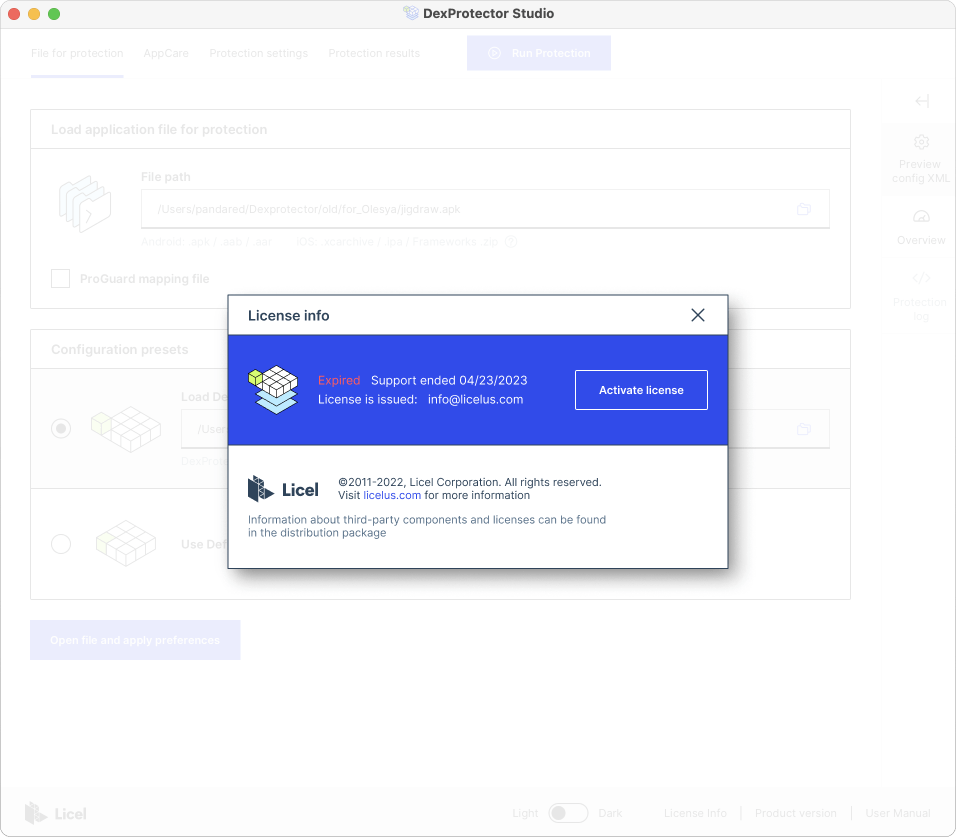
You can view and manage your license status by clicking License Info at the bottom right of the opening window.
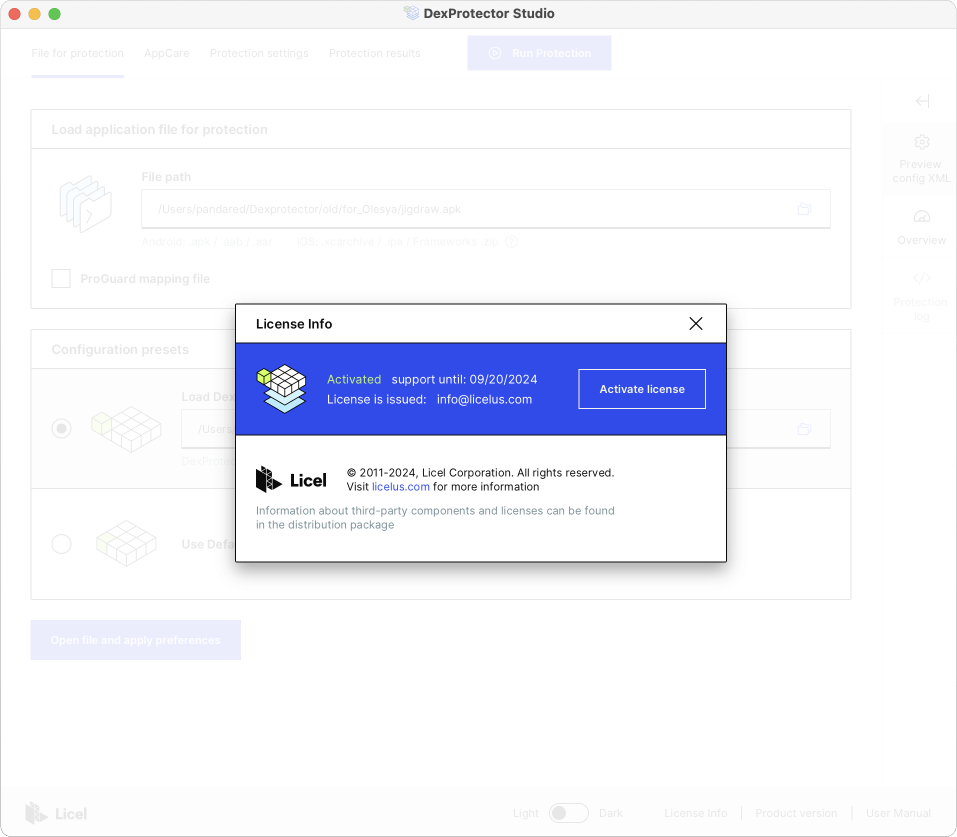
And if you have not yet activated your license, you can do so here.
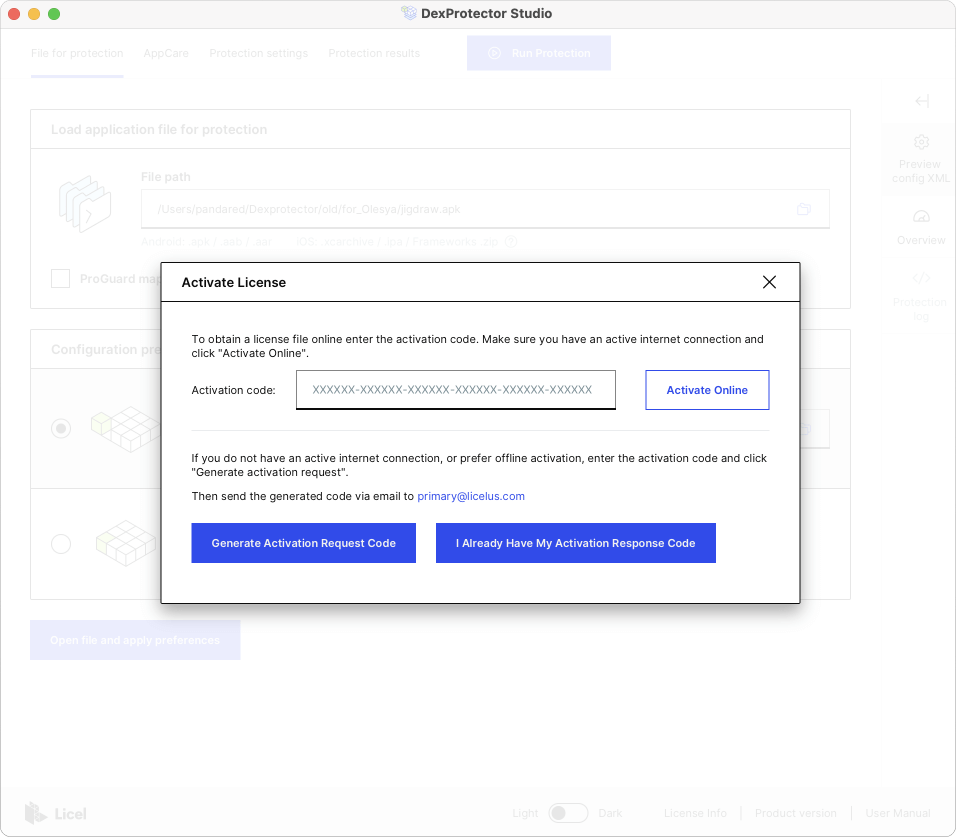
Activating your license via Studio (online)
- Click on ‘License Info’ to the right of the bar at the bottom of the window.
- Click ‘Activate License’ and follow the instructions in the new window. To activate your license and obtain a license file online, simply enter the unique, single-use activation code provided in the email with your download links. If you don’t have an active Internet connection, or prefer offline activation, see how to Activate via DexProtector Studio (offline).
- After successful activation, the license file
dexprotector.licelwill be created in the user's home folder.
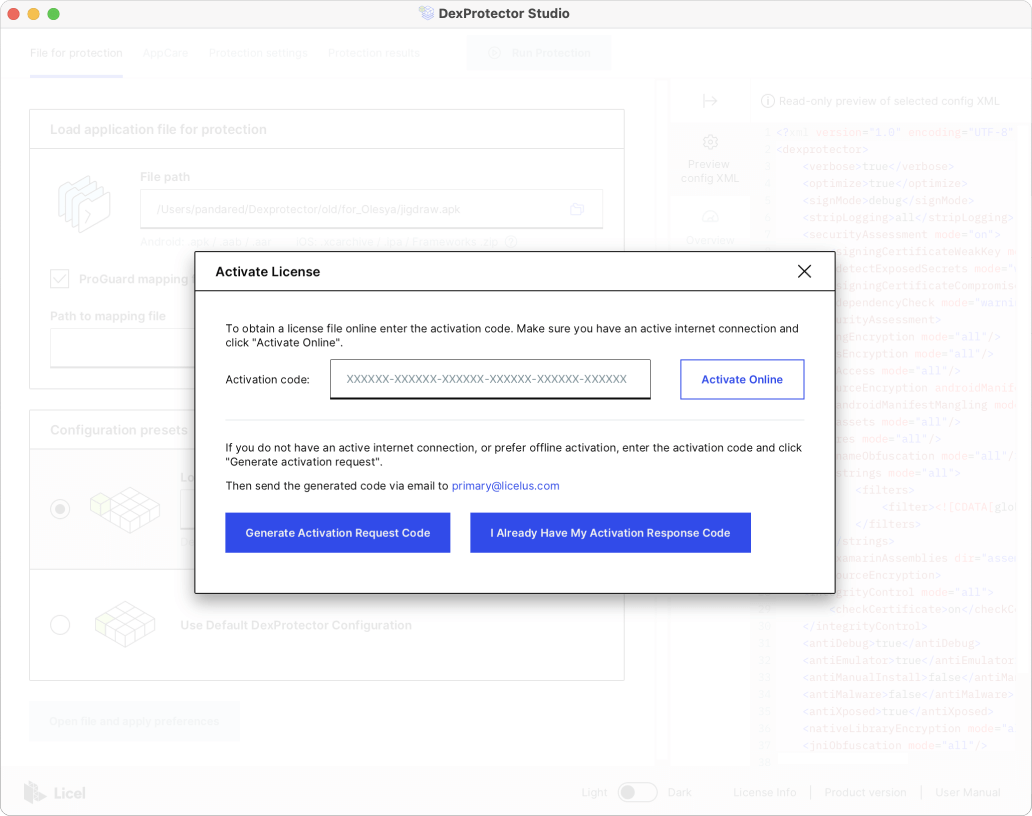
Activating your license via Studio (offline)
- Click on ‘License Info’ to the right of the bar at the bottom of the window.
- Click ‘Activate License’ and follow the instructions in the new window. If you don’t have an active Internet connection, or have prefer offline activation, enter the unique, single-use activation code provided in the email with your download links, and then click ‘Generate activation request’.
- When you have entered a valid activation code, a request code will be generated. Email this request code to our support team. You will receive a response code as soon as possible, within a maximum of 1 business day.
- When you have received your response code, return to the same ‘Activate License’ window, and click ‘I Already Have My Activation Response Code’. In the following window, enter the response code you’ve received and click ‘Activate’ to complete the license activation procedure.
- After successful activation, the license file
dexprotector.licelwill be created in the user's home folder.
Protecting your iOS app or Framework with DexProtector Studio
Protection Recommendations
We strongly recommend making use of all of the security features provided, as each element of protection adds more security and more resistance against malware, reverse engineering, tampering, and Man-in-the-Middle attacks.
DexProtector configuration is by means of a single XML file, which can be edited directly or via the DexProtector Studio interface.
A default configuration file (dexprotector.xml) can be found in the root folder of the distribution package, but every app (or SDK) has different requirements. We therefore also strongly recommend that you tailor your configuration, in order to target sensitive code and resources for protection, and to enable the Runtime Application Self-Protection and network security mechanisms that DexProtector offers.
DexProtector Studio offers an intuitive interface to guide you through configuring and managing your protection process. It offers descriptions and hints for each protection mechanism in its 'Protection settings' windows, and allows you to apply your chosen settings at a click. These settings are then defined instantly and automatically in the configuration XML file, ready to be applied when the DexProtector process is run.
Note: For some features, a DexProtector Enterprise license is required. For more information, see our feature comparison for DexProtector Standard and DexProtector Enterprise.
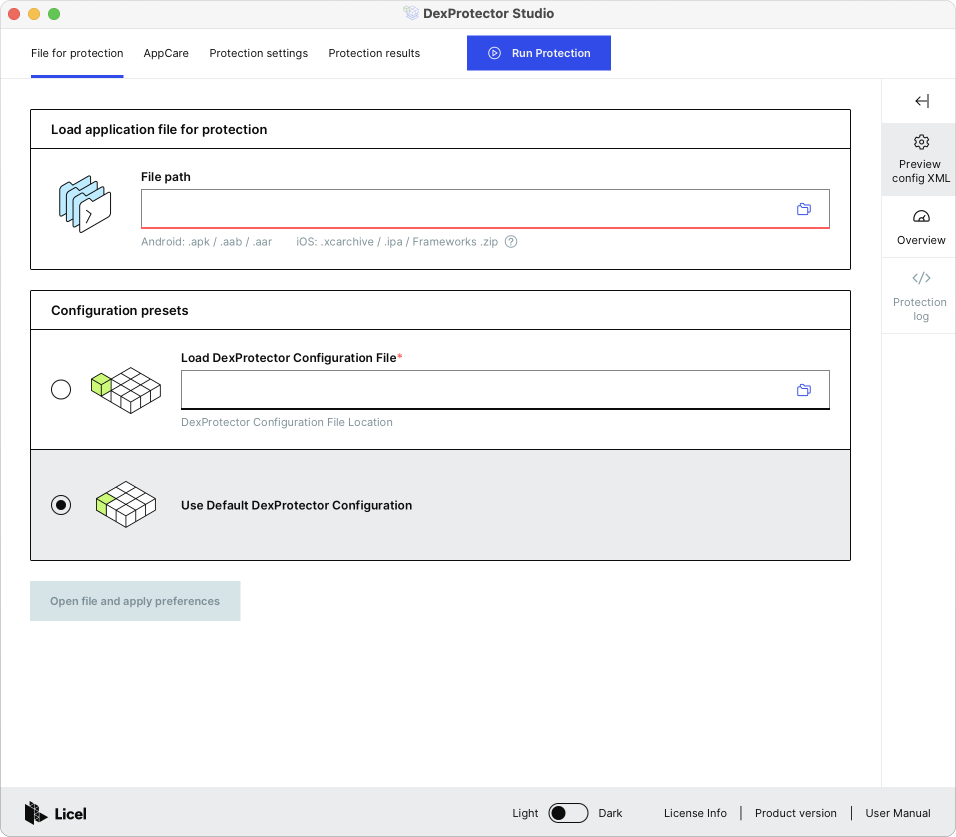
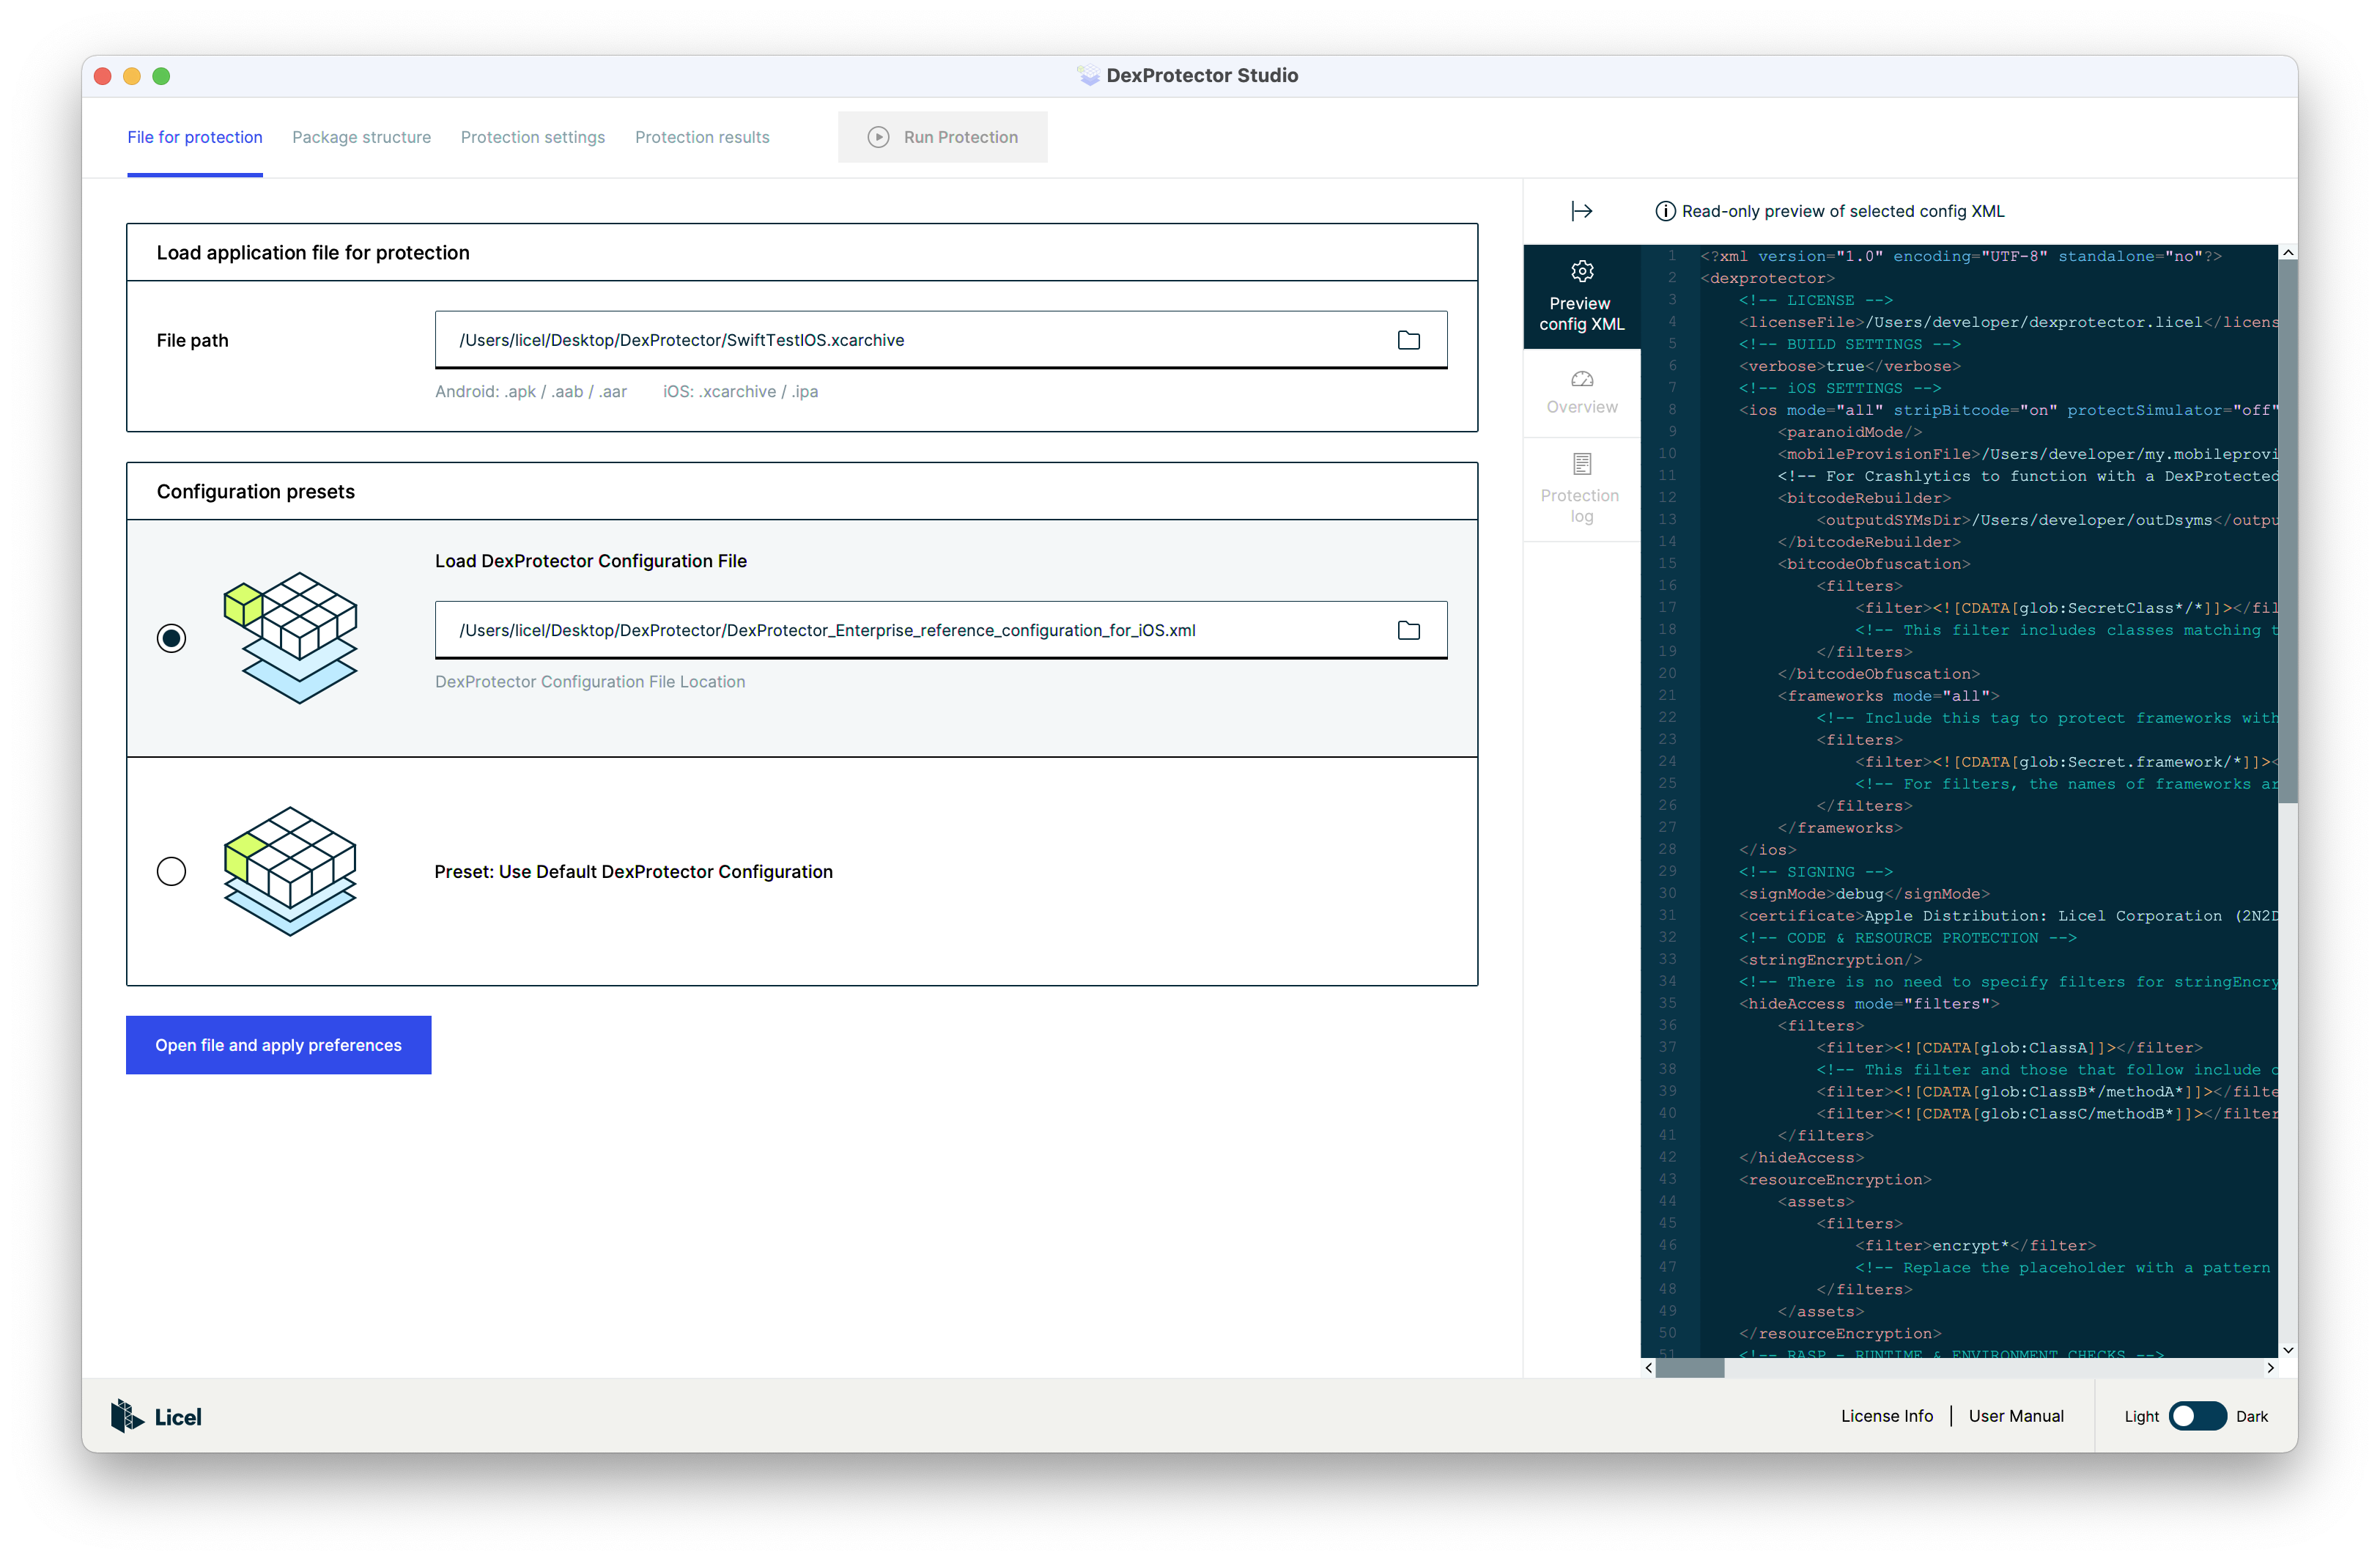
Load Package for Protection
The first window allows you to specify your DexProtector inputs, in the form of the package you will be protecting, and an initial configuration file, which can be edited later through Studio. You can select either the default configuration included in the distribution package, or a customized configuration XML of your choice.
Here, the file to be loaded for protection is an xcarchive, and a custom configuration file is selected.
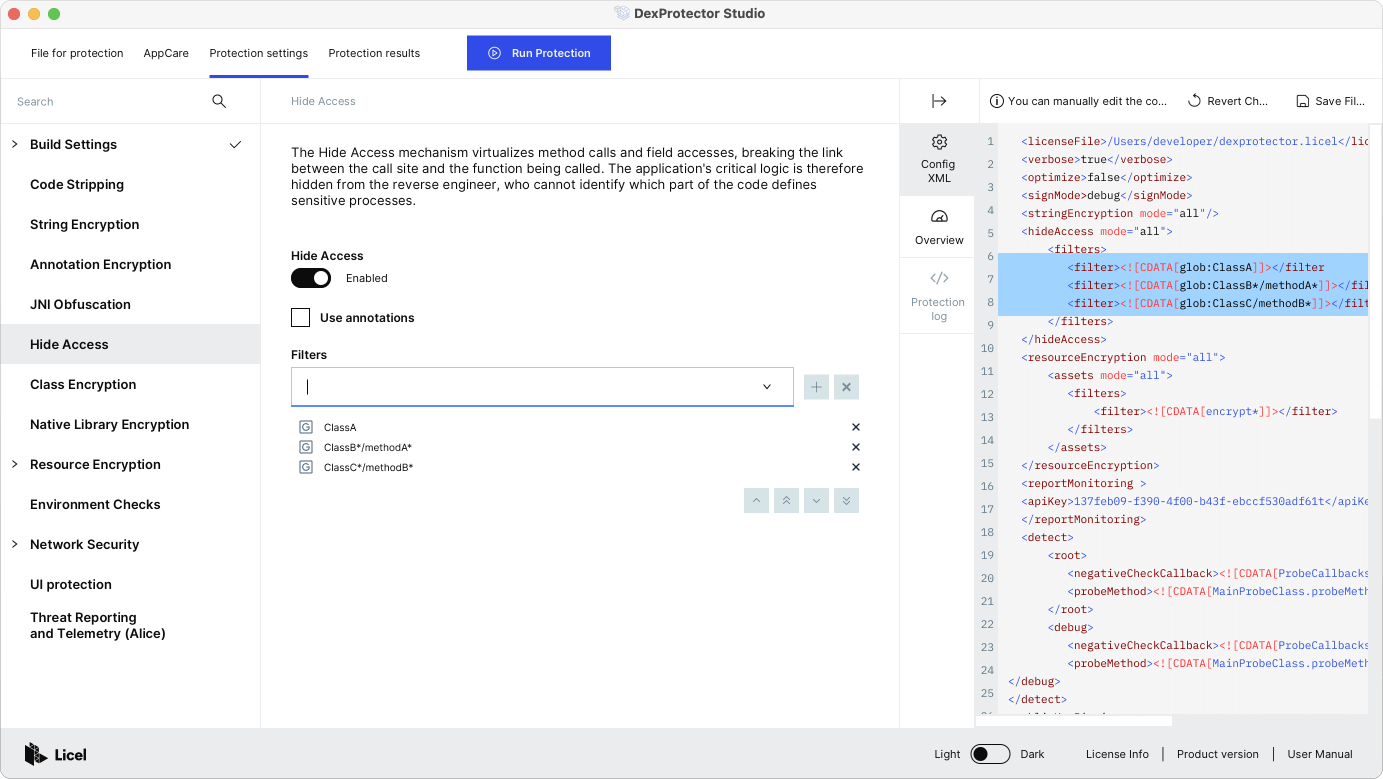
Manage Protection Settings
After clicking 'Open file and apply preferences', you can manage your protection settings. The 'Protection settings' window gives you an overview of all configuration options; you can manage all protection mechanisms and apply filters through the interface elements:
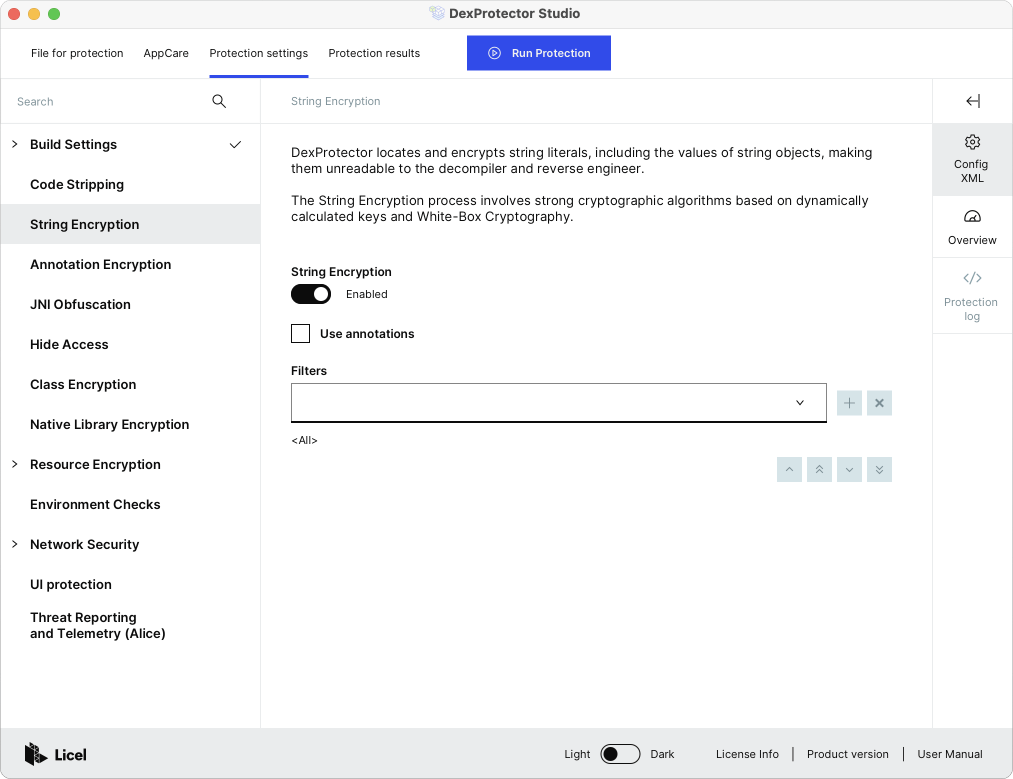
Or by editing the configuration XML manually. Any changes to the configuration XML made through Studio can be saved at any time, including after the protection process.
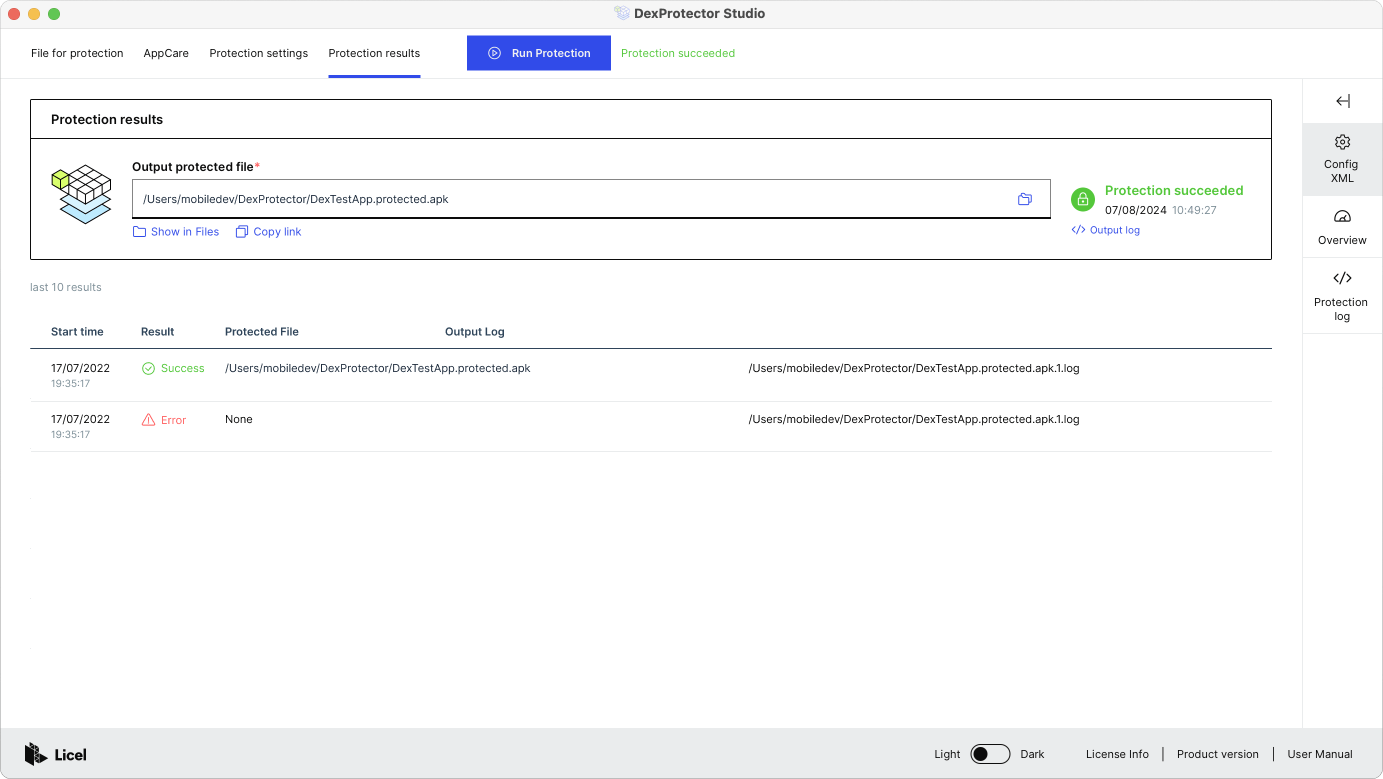
Run Protection and View Protection Results
Then click 'Run protection' and you can observe the DexProtector process as it occurs. This should only take several seconds.
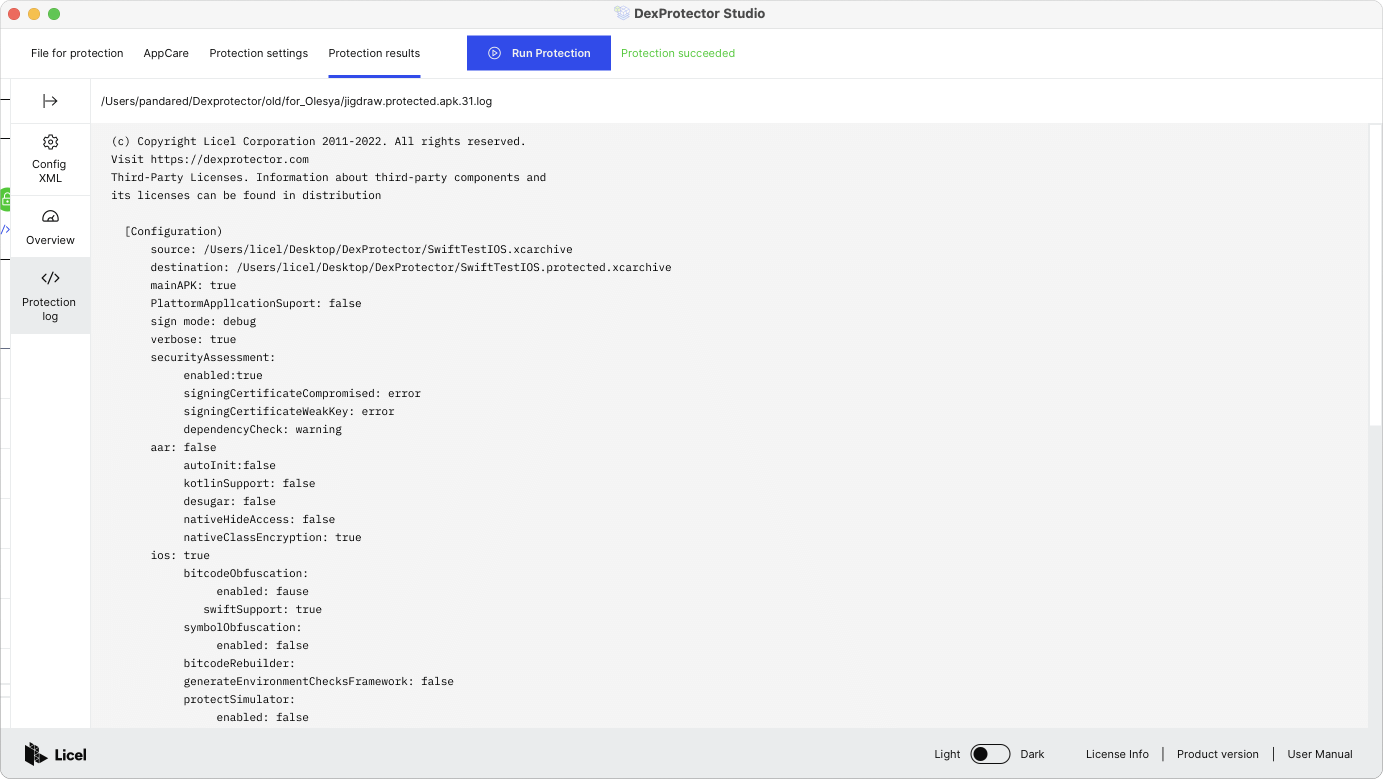
Afterwards, you can easily view the the protection log, the path to the protected package, and an overview of recent protection results:
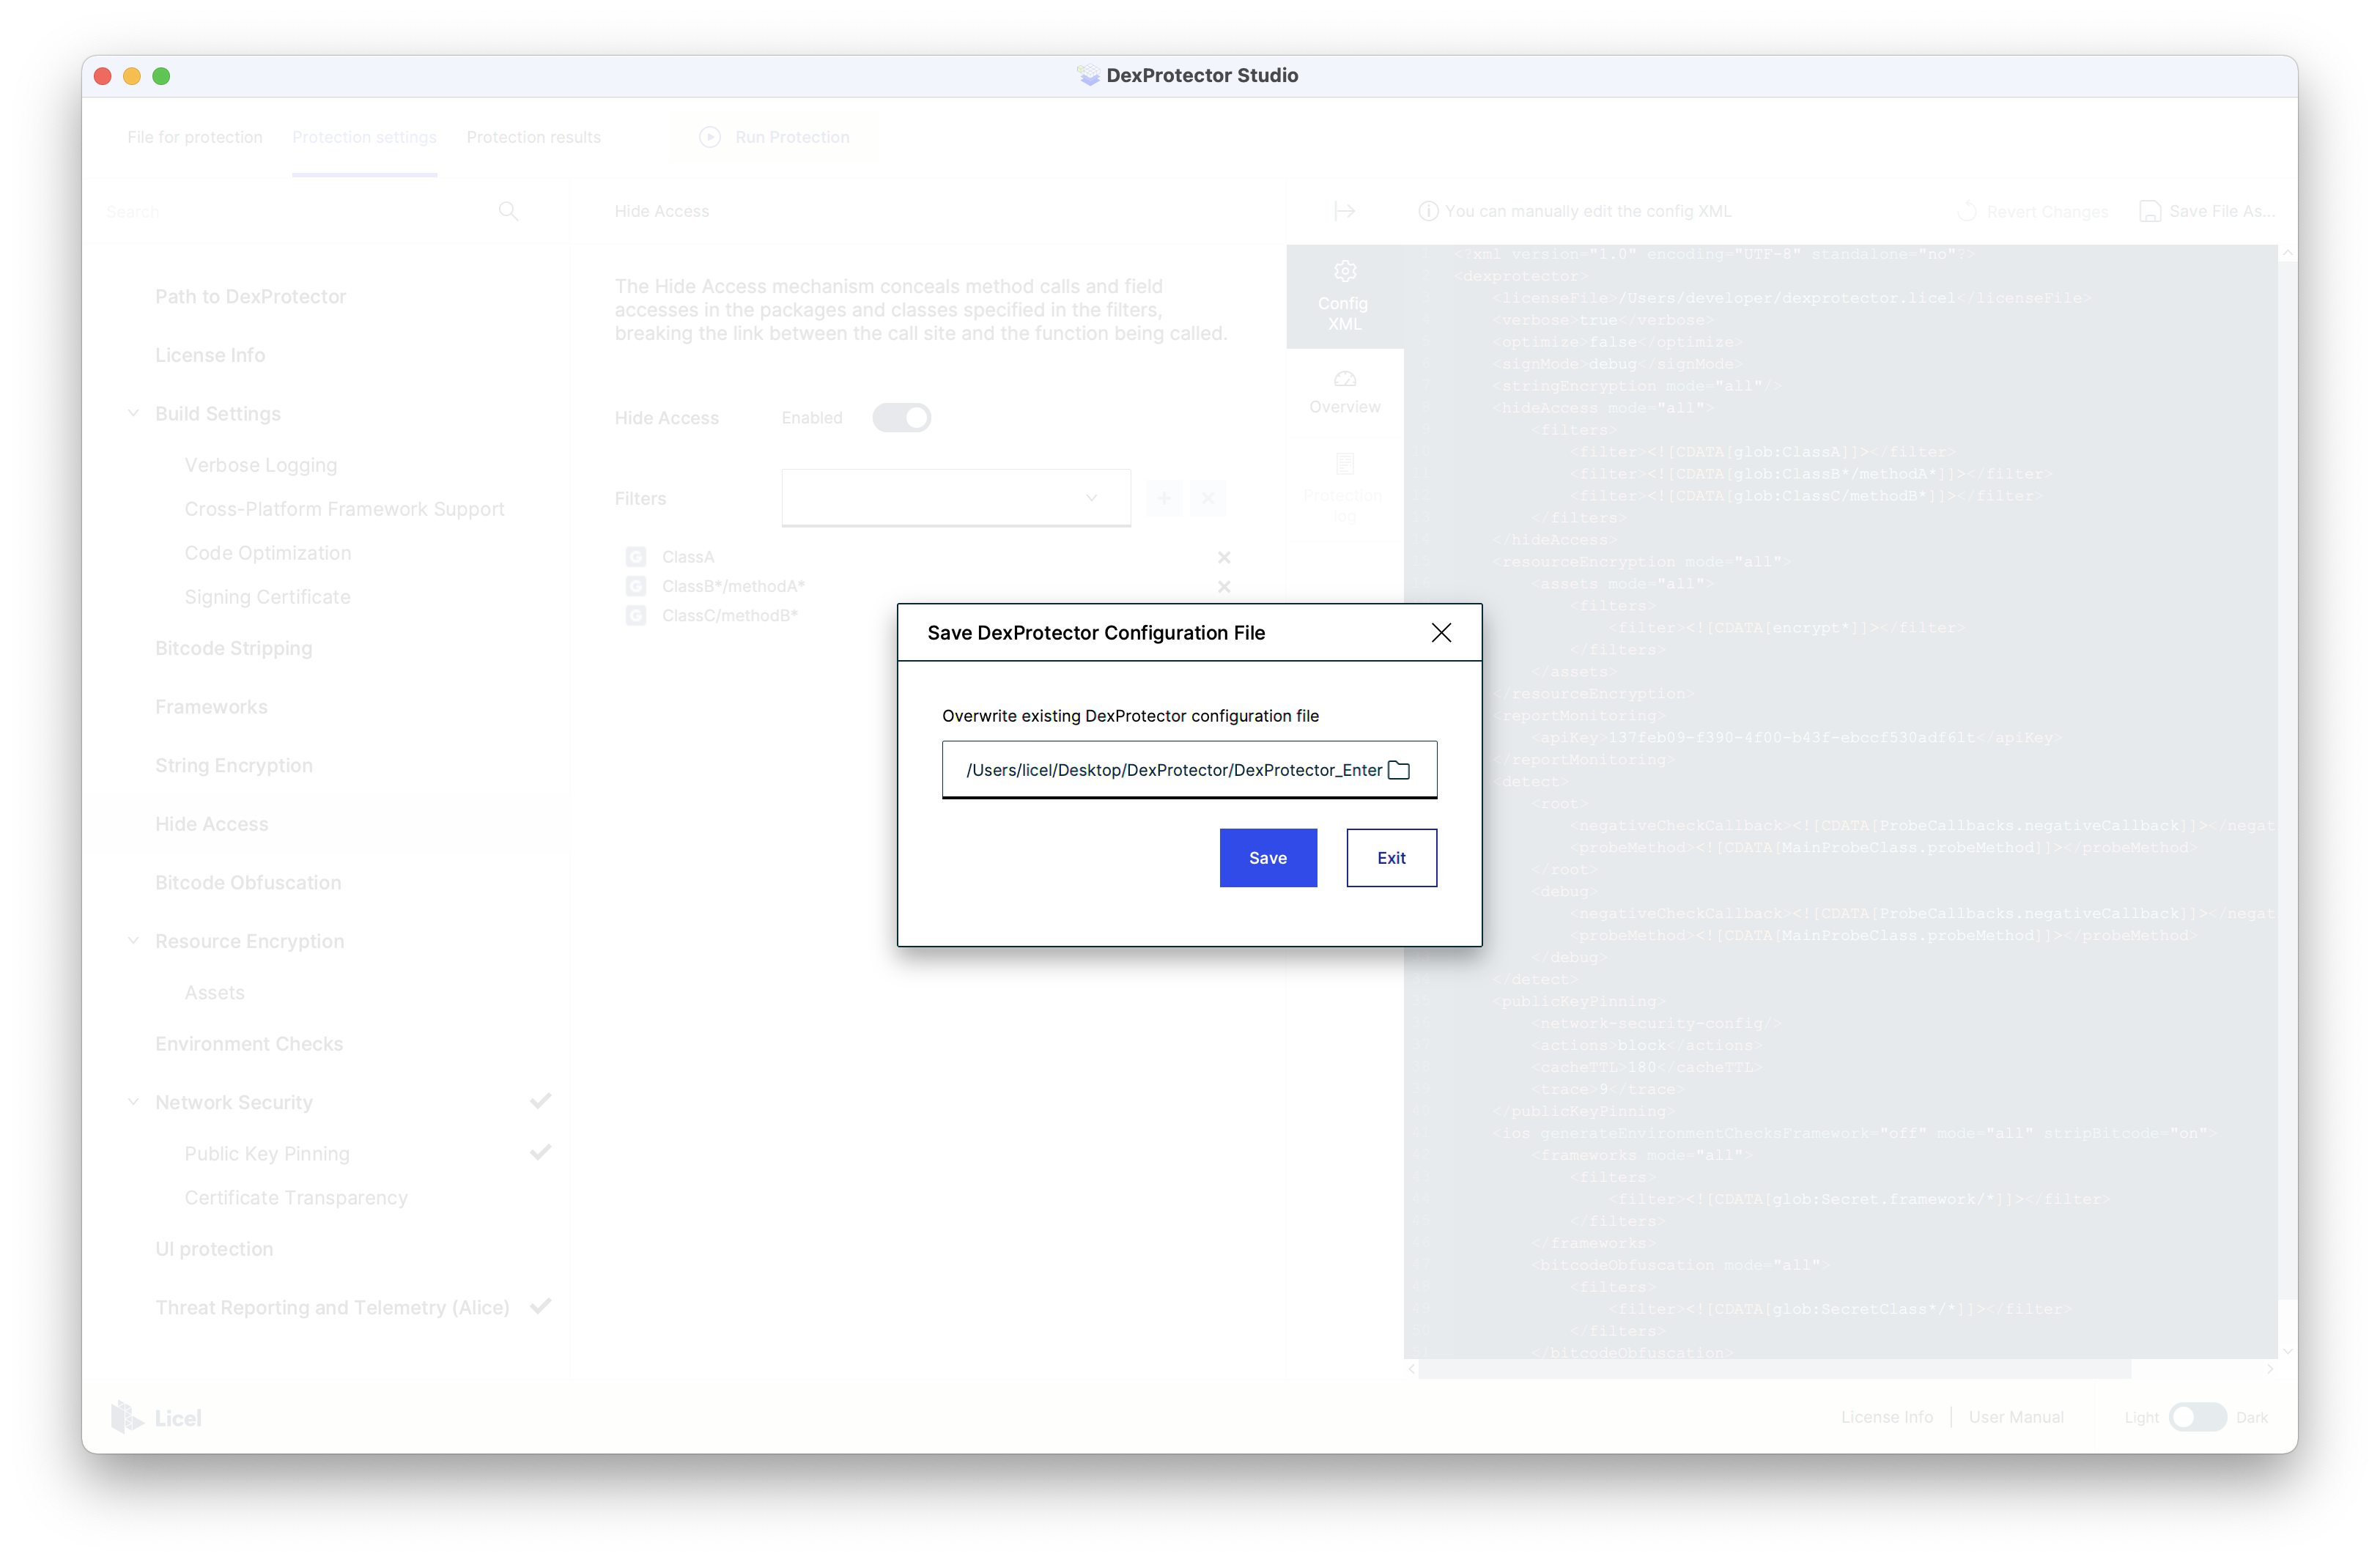
And when you are finished, you can save your newly created configuration profile to be referenced, reused, or adapted later:
-
What is DexProtector?
Introduction to DexProtector > What is DexProtector? -
Obfuscation & Encryption Capabilities
Introduction to DexProtector > Obfuscation & Encryption Capabilities -
RASP, Security, and Anti-Fraud Capabilities
Introduction to DexProtector > RASP, Security, and Anti-Fraud Capabilities -
Overview
DexProtector for iOS > Overview -
1. Download
Getting started > 1. Download -
2. Activate
Getting started > 2. Activate -
Activate via CLI (online)
Getting started > Activate via CLI (online) -
Activate via CLI (offline)
Getting started > Activate via CLI (offline) -
Activate via DexProtector Studio (online)
Getting started > Activate via DexProtector Studio (online) -
Activate via DexProtector Studio (offline)
Getting started > Activate via DexProtector Studio (offline) -
3. After activation
Getting started > 3. After activation -
Introduction to configuring DexProtector
Configuring DexProtector > Introduction to configuring DexProtector -
Configuration file overview
Configuring DexProtector > Configuration file overview -
Filters: A guide to targeting resources
Configuring DexProtector > Filters: A guide to targeting resources -
Resource Encryption
Configuring DexProtector > Resource Encryption -
Configuring DexProtector for applications
Configuring DexProtector > Configuring DexProtector for applications -
JavaScript and HTML-based Hybrid and Cross-Platform Apps
DexProtecting Hybrid and Cross-Platform Applications > JavaScript and HTML-based Hybrid and Cross-Platform Apps -
Flutter
DexProtecting Hybrid and Cross-Platform Applications > Flutter -
Frameworks
DexProtecting iOS Frameworks and XCFrameworks > Frameworks -
XCFrameworks
DexProtecting iOS Frameworks and XCFrameworks > XCFrameworks -
Overview
DexProtector Studio > Overview -
Using DexProtector Studio: DexProtector JAR and License File
DexProtector Studio > Using DexProtector Studio: DexProtector JAR and License File -
Managing DexProtector JAR and License File
DexProtector Studio > Managing DexProtector JAR and License File -
Activating your license via Studio (online)
DexProtector Studio > Activating your license via Studio (online) -
Activating your license via Studio (offline)
DexProtector Studio > Activating your license via Studio (offline) -
Protecting your iOS app or Framework with DexProtector Studio
DexProtector Studio > Protecting your iOS app or Framework with DexProtector Studio -
Protection Recommendations
DexProtector Studio > Protection Recommendations -
Load Package for Protection
DexProtector Studio > Load Package for Protection -
Manage Protection Settings
DexProtector Studio > Manage Protection Settings -
Run Protection and View Protection Results
DexProtector Studio > Run Protection and View Protection Results -
Final Checklist
Completing the DexProtector Process > Final Checklist -
Run DexProtector via the CLI
Completing the DexProtector Process > Run DexProtector via the CLI -
Run DexProtector via DexProtector Studio
Completing the DexProtector Process > Run DexProtector via DexProtector Studio -
Using Alice with DexProtector
Alice - Threat Reporting and Telemetry > Using Alice with DexProtector -
General FAQs - DexProtector for iOS
FAQs > General FAQs - DexProtector for iOS -
FAQs on Installation, Activation, Configuration, and Distribution
FAQs > FAQs on Installation, Activation, Configuration, and Distribution
Link copied!